 Spaceward Ho! for Palm OS
brought to you by MobileFreon
Version
September 11, 2003 -- 1.0.4
Manual
Spaceward Ho! for the Macintosh comes with built-in help. To learn more about
Spaceward Ho!, download the Macintosh game.
Tips
How To Play the Palm OS Version
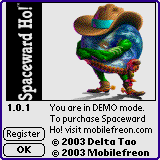
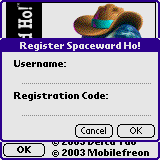
The Palm OS version of Spaceward Ho! plays much the same way as the Macintosh/PC version. After launching the game for the first time, you will be presented with the About box. If you have already purchased Spaceward Ho! for Palm OS you can enter your registration code now to unlock the game. Click the Register button and enter your Username and Reg code.
Then click the OK Button.
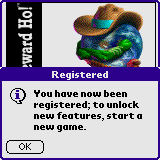
If you entered a valid username and registration code, you will receive a conformation dialog indicating the registration code was accepted.
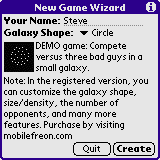
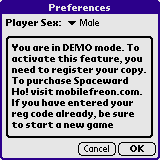
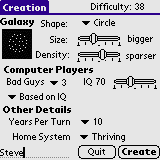
If you are still playing a DEMO game, once you leave the About screen you will see the New Game Wizard. The New Game Wizard provides information for the first-time user on the various parameters that will contribute to the setup of their game. In the registered version, this screen would provide you with additional options to configure. Click the Create button to start the game.
If you are playing in DEMO mode, the Preferences, Rank History and Auto-Play dialogs will be disabled. For the DEMO mode, the user can customize their gender preference. The Enemy And Allies dialog in DEMO mode will not allow the user to ally with the computer players.
 |
If you registered your copy of Spaceward Ho!, once you leave the About screen you will see the Creation screen. This screen provides all of the currently available options that the user can use to customize the type of game they would like to play. Note: not all options are available. Additional features are made available after you accumulate master points from winning games. The more difficult the game, the more points you are awarded if you win. Click the Create button to start the game.
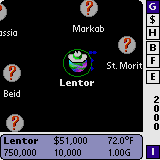
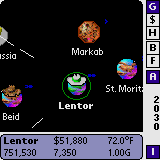
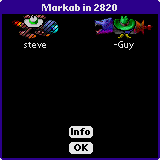
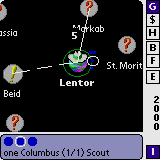
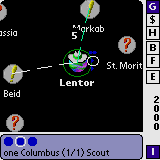
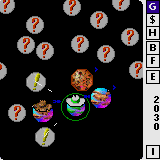
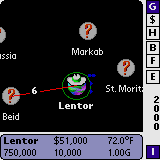
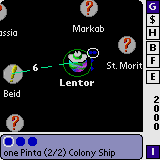
The Galaxy Screen gives you a zoomed-in view of your home planet, the info about that planet
and the menu-bar on the right side. The green circle around the planet indicates which planet
is currently selected (the name of the planet is also in bold).
The area on the button contains the information about the current selection: the name of the planet,
the size of the planets population, the current income (or cost) of the planet, the remaining amount
of metal, the current temperature and gravity.
The menu-bar along the right side contains seven buttons.
- G
- Galaxy Screen - push this button to see the galaxy
- $
- Spending Screen - push this button to see the spending screen for both the planets and the tech levels
- H
- History Screen - push this button to see the history screen
- B
- Build Ships Screen - push this button to open the build ships dialog. Make sure you have a planet that you have colonized selected.
- F
- Organize Fleets Screen - push this button open the organize fleets dialog. Make sure you currently have selected a planet where one or more fleets is stationed.
- E
- End Turn Button - push this button to end your turn. If you have Auto-Play enabled
(note: only available in registered version), the E button will changed to an A button. - I
- Info Window - push this button to see the info window for your current selection
|
|
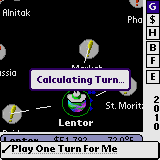
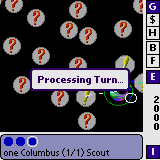
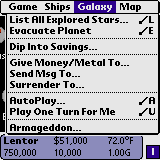
In auto-play, or if you select the menu-item Play One Turn For Me, a message will be displayed on the screen while the computer is calculating your move for you. In this mode, the computer will manage all aspects of the game for you, for that turn.
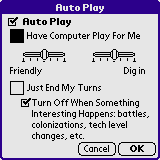
The auto-play feature allows the player to select whether the computer should calculate moves for
the player or just end the turn. If you specify that the computer should calculate the move
for each turn for you, you can specify how aggressive and defensive the computer will act. The first
slider specifies aggressiveness. To have the computer play aggressive for you, move the slider all
the way to the right. The second slider specifies defensiveness. To have the computer play defensively
for you, move the slider all the way to the right. Note: Aggressiveness and defensiveness are not
mutually exclusive.
You can
also specify if the auto-play feature should disengage if something of interest happens.
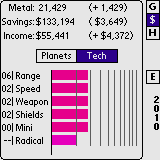
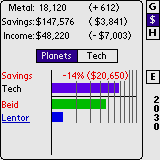
The Spending Screen shows the spending levels for each planet as well as the overall spending
levels for Savings and Technology. To adjust the spending levels, simply click on the bar at
the location you want to change the spending to. The bar will snap to that location. You can also
drag the bar left/right to decrease/increase the value.
The top portion of the Spending Screen is dedicated to informing the user as to the current status
of their Metal, Savings and Income. These values are shown adjacent to the labels that bear their
name. Beside each number is a value in parenthesis. This value represents the change that will
ocurr as a result of the turn ending.
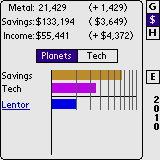
By selecting the Tech button, the user can show the spending levels for each technology. Just as with the planets spending screen, the tech levels can be adjusted by clicking on a particular bar and dragging to the left or right or simply click at the location desired for the bar and it will jump to that value.
The History Screen shows the result of turns that have already past. The game will save
the last 80 messages for review by the player. Once there are more than 80 messages, the game
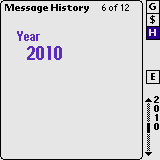
will throw away the oldest messages as new ones are stored. Each turn begins with a message
indicating the year of that turn.
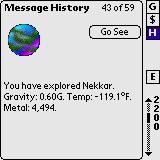
If there are is a related planet
to the action depicted in a history message, clicking on the screen or on the Go See
button will take the user to that planet in the Galaxy Screen.
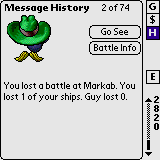
If the message describes a battle that took place, a button will be visible which will take
the user to the Battle Dialog to review the battle.
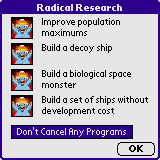
If the message concerns the radical research program, a button will be visible to take
the user to the Cancel Program screen where the user can cancel a particular radical
research program. note: Only applicable if there is a radical research program to cancel.
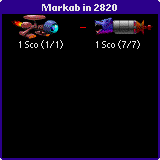
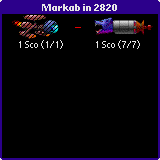
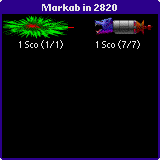
An example of a history message where the user can jump to the planet about which the message pertains.
The Cancel Radical Research Program dialog. Here the user can select one of the radical research programs to cancel, thereby concentrating radical research dollars on a smaller list of programs.
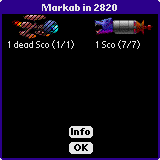
A history message depicting the results of a battle. The hat icon for the winner is displayed along with a summary of the results. To see the battle, click the Review Battle button.
The Battle Dialog
|
|
|
Once a battle has completed, you can click the Battle Dialog Info button to cycle through the three displays of information available in the Battle Dialog. When finished with reviewing that battle, click the OK button.

|
|
|
From the Galaxy Screen, the user can move fleets by selecting the desired fleet and dragging it to the destination planet. Once the fleet has been selected, the user can drag from either the fleet itself or from the planet that the fleet orbits. If the path is valid (which means that the fleet has enough fuel and range), then the path will be white. Once the user lifts the pen, the fleet path will turn green in color and split into a dashed line indicating how many turns the trip will take. A distance to the planet will be displayed next to the path.
If the user tries to drag a fleet to a planet that is out of range or if the fleet does not have enough fuel to reach that destination, the path will be drawn in the color red.
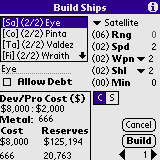
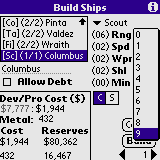
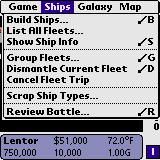
To bring up the Build Ship Screen, the user can either double-tap on the colonized
planet to build a ship at, or select the colonized planet and click the B
button from the right-menu. A third alternative, the user can select the Build Ship
menu item. One the Build Ship screen is visible, the user can customize the type
and number of ships they would like to build.
The list on the left indicates ship types that the user has already designed. To use
one of these pre-existing desings, simply select the design from the list, change the
number of ships to build to the desired number and click the build button. The ship(s)
will be built at that planet. The user can also modify the design if so desired. Pick
a different ship type, change any of the traits available for the type and change the
name if so desired. For convenience, click the Max button to max out all
appropriate stats for that ship type.
The display will show the both the Development and Production cost in currency and
the cost in metal for each vessel along with the costs for the entire order. It will
also show how much money and metal you would have left after building your ships. Other
information available includes the total build capacity at this planet, the number of
ships of that type built and how many are currently in service. The user can even decide
to go into debt while purchasing new ships by selecting the Allow Debt checkbox.
|

|
|
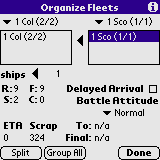
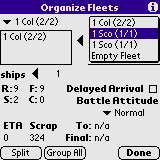
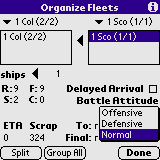
In the Organize Fleets dialog, the user can move ships from one fleet to another or
to a new fleet. This screen contains two pop-up lists and below that two more lists.
The user can select a fleet from the list of fleets at that planet by clicking on
one of the pop-ups. The list below the pop-up will be propogated with the ships
contained within that fleet. The user can then elect to transfer any or all ships
to one or more different fleets, even creating new fleets by transfering ships to
the Empty Fleet.
The Organize Fleets Screen also shows important information about each fleet. The
information is for the currently selected fleet, which is the fleet whose ships
are selected in either the list on the left or the right. The R is the Range
of the fleet, the F is the remaining Fuel for the fleet, the S is
for the Speed of the fleet and the C is for the number of Colonists in the fleet.
Along with these values, the Estimated Time of Arrival for the fleet if it is in transit,
its current and final destination and its scrap value are also given.
Further customizations of fleets include ordering a ship in a fleet to delay its arrival
at a planet (in the hope of avoiding the battle) as well setting its Battle Attitude.
For convenience, the Split button will quickly break a fleet up into individual
fleets of each type or if the original fleet was all of a single type of ship, then individual fleets
with one of each ship. The Group button will group all fleets at a planet into
one single fleet. When the user is done making modifications to their fleets at this planet,
click the Done button.
|
|
|
Once you are ready to complete your turn, tap the E button to let the computer process the turn.
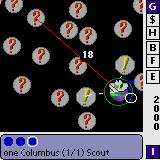
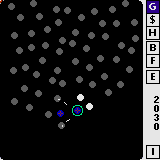
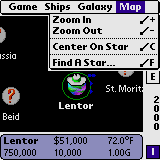
There are two other zoom levels for the Galaxy screen which show more of the galaxy. With each level, there is less information displayed on the screen.
|
|
There are four menus that can be accessed from the Galaxy Screen (if you tap the menu soft-button from the Spending or History Screen, you will be moved to the Galaxy Screen and the menu activated).
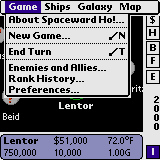
|
|
|
|
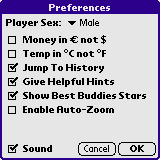
The preferences are used to customize your game play.
|
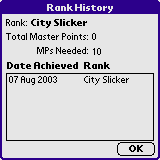
The Rank History dialog.
|
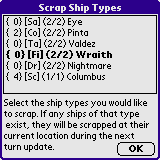
The Scrap Ships dialog.
|
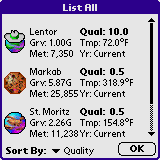
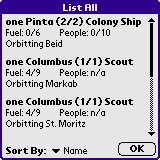
The List All Planets and Fleets dialog.
|
|
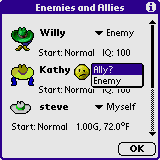
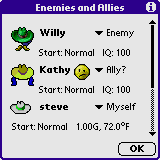
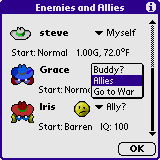
Enemies and Allies Screen.
The Enemies and Allies screen provides several pieces of information. First, the order
indicates who is winning the game currently. Secondly, it shows which players have
been eliminated (they will be at the bottom of the list with an X-mark through their
icon). Thirdly, it shows who the IQ and starting home system type for the computer players.
Fourthly, it indicates which players have requested or formed alliances with you.
Requests by other players for an alliance with you are indicated by a happy-smiley face
next to the player's name. Alliances that you have requested with other players are represented
by the frown-smiley face. When a player allies with you, the smiley face is removed and the
pop-up is replaced with the appropriate choices, either if you are allied or best buddies.
Use the pop-ups to change your desired status with any given player.
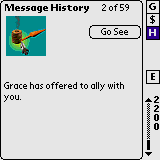
From the Message History screen, when you see a message indicating a player has changed
thier status of an alliance, you can use the Go See button to take you to the
Enemies and Allies screen directly.
|
|
|
|
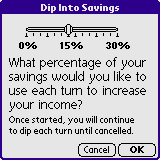
The Dip Into Savings dialog. The user can decide to dip into their savings to supplement their income if they do not have enough money to do what they need to do. On the Spending Screen, the Savings bar will be disabled and it will show how much is being pulled from savings to supplement your income.
|
|
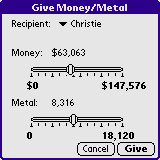
The Give Money/Metal dialog.
|
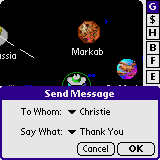
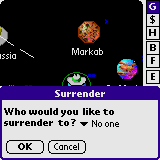
Send Message and Surrender Dialogs.
|
|
The Armageddon Device dialog.

|
To show the distance between two stars, drag from one planet to another without a fleet being selected and a distance line will be shown.
|
The ship info window is shown when you select a fleet. This info window facilitates the user selecting fleets, especially when zoomed in.
|
 |
Legal Hoopla
Spaceward Ho! for Palm OS is ShareWare. It is not freeware or in the public domain.
To unlock the game and access the non-demo features of Spaceward Ho! for Palm OS, you will need to pay for the software.
Spaceward Ho! for Palm OS is NOT guaranteed. MobileFreon takes NO RESPONSIBILITY for any damage this program may cause to your system or data due to either defect or misuse. While every effort is made to deliver bug-free software, it is not a perfect world. Please forward all feedback and bug reports
using our contact page.